

中文

Contact us
tel:15797766463
mail:business@seeshiontech.com
Update time : 2019-10-31 22:23:01
Standard Template is the most commonly used template type. To understand it, we need to compare it with dynamic Template.
You can find detailed description of standard template from this doc.
The workflow of creating a standard template and delivering it to C-end users contains some important steps.
Create your design
You can use After Effects to create your video design, this part should already be familiar to you. If not, you can find some great tutorials online to get you started.
Export your design
Export your design is a very important step. You mainly use VE Exporter to export your After Effects project as VE template.
Present your design in your app
Preset your template in your app is not that hard with our SDK. But that process involves coding, so we will not discuss it in this article.
You can find detailed guide for iOS at here and Android at here
As mentioned above, creating your video design mainly requires the ability to use After Effects.
You can find a lot of great tutorials fom Adobe website or youtube channels.
But what you need to keep in mind when creating your After Effects project is that VE currently supports limited After Effects features and effects. Please refer to this article for detailed list.
Just an effect is not supported by VE does not mean you can\'t use it in your project at all. Let\'s say if you are using some particle effects created by Particular plugin, Particular is not supported by VE, but as long as you don\'t want C-end users to change those effects, you can just pre-render those effects as video footages.
In this way, you can use a lot of unsupported features in your project, and pre-render them before exporting your project as VE template.
When preparing your project for exportation, you might want to take a look at VE Cleaner, it contains a lot of handy tools to help you automatically clean up your project.
The complete process of exporting your project contains following steps.
We are going to use a demo project as reference and walk you through all those steps in detail.
Before we begin, make sure you have installed VE Exporter. If you haven\'t, you can download it from here, and read this page for installation guide.
Also, you can download the demo project from here. This project is created using After Effects CC 2019.
Also, you should read this guide first to have a basic understanding of VE Exporter\'s UI before we begin.
After opening the project in After Effects, you can find a comp named "main", this comp is the main comp of our video design. When doing your own video design, you don\'t have to name the main comp "main", you can name it anything you like.
You can open the main comp in the timeline and preview it. This project is basically showcasing 4 user photos with an end title.
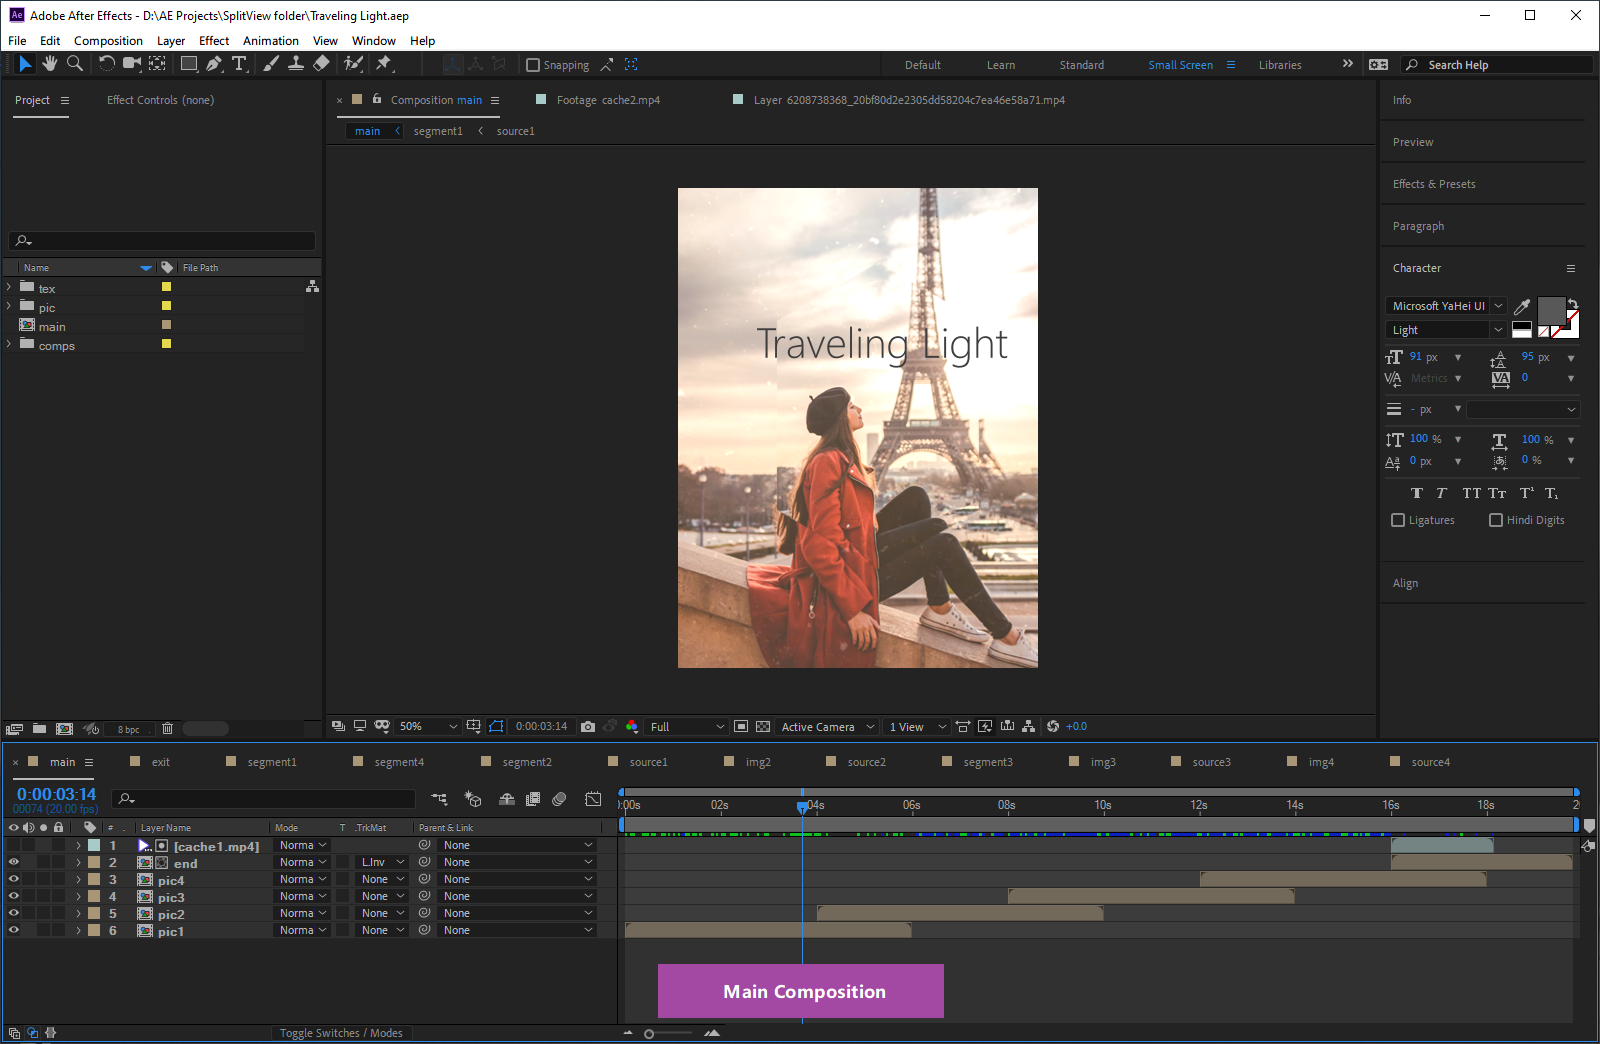
To load the main comp, first, let\'s open VE Exporter and enter "Standard Template 2.0" workspace.

OK, now you are ready to load your main comp. It\'s very easy to do so, just open and select the main comp in the timeline, and the click the "Load Comp" button on VE Exporter\'s interface.
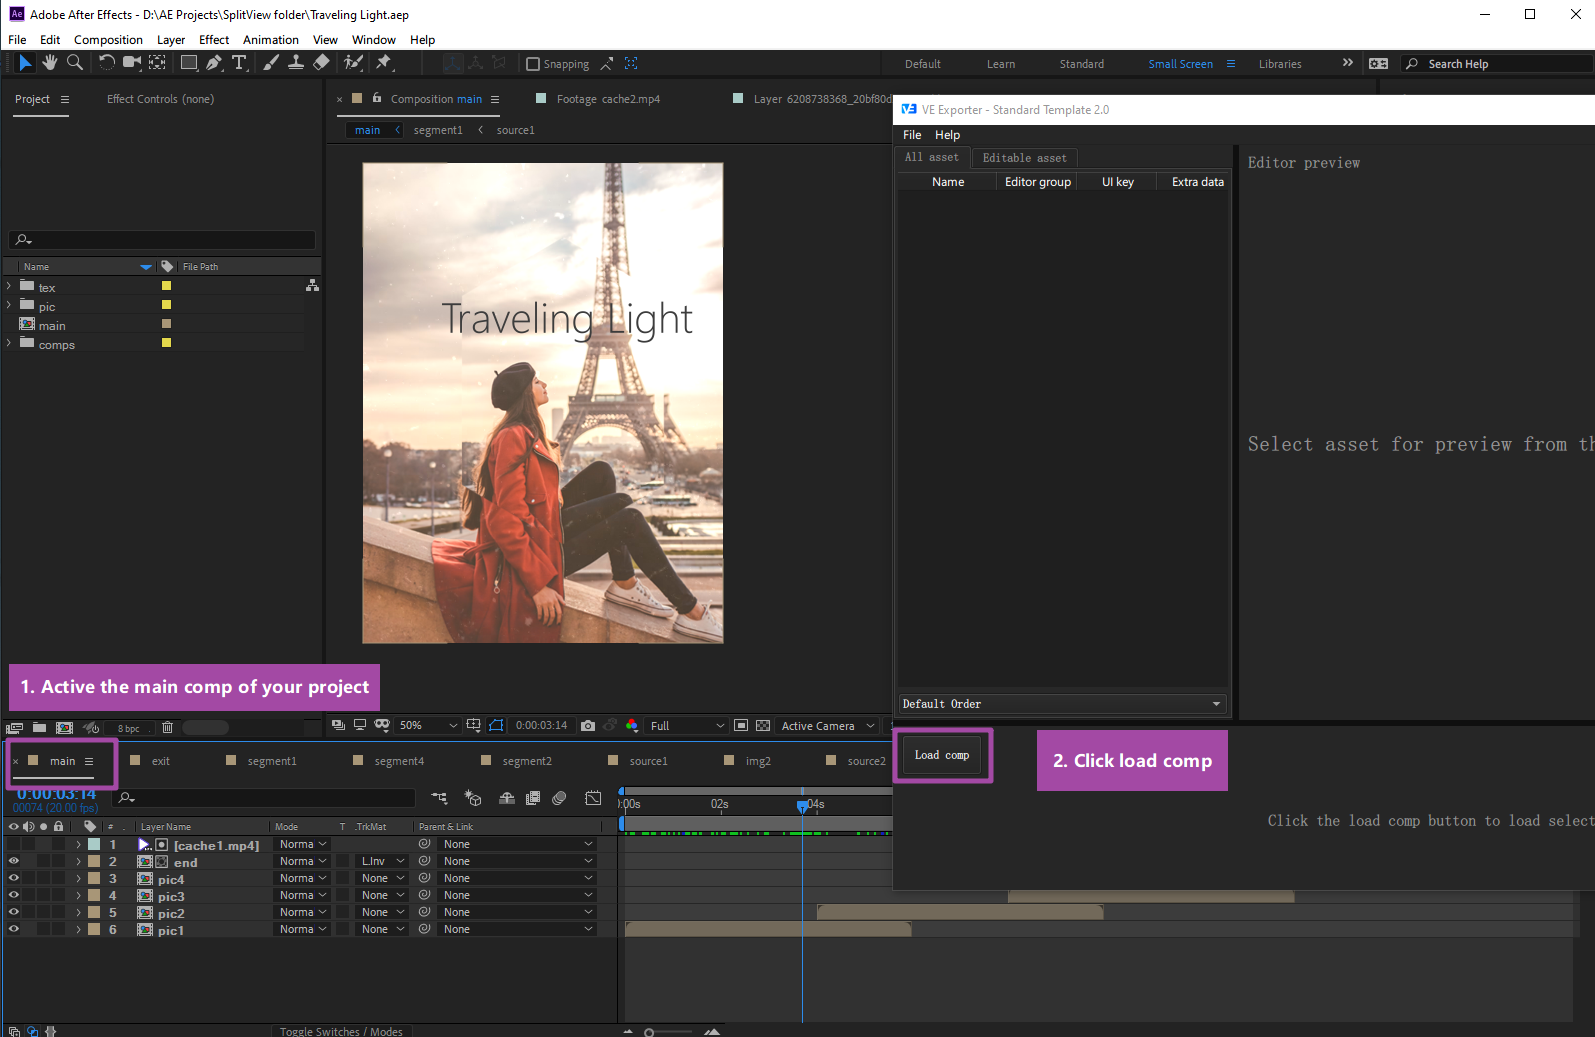
After loading the main comp, your VE Exporter interface should be filled with the contents of your project now.

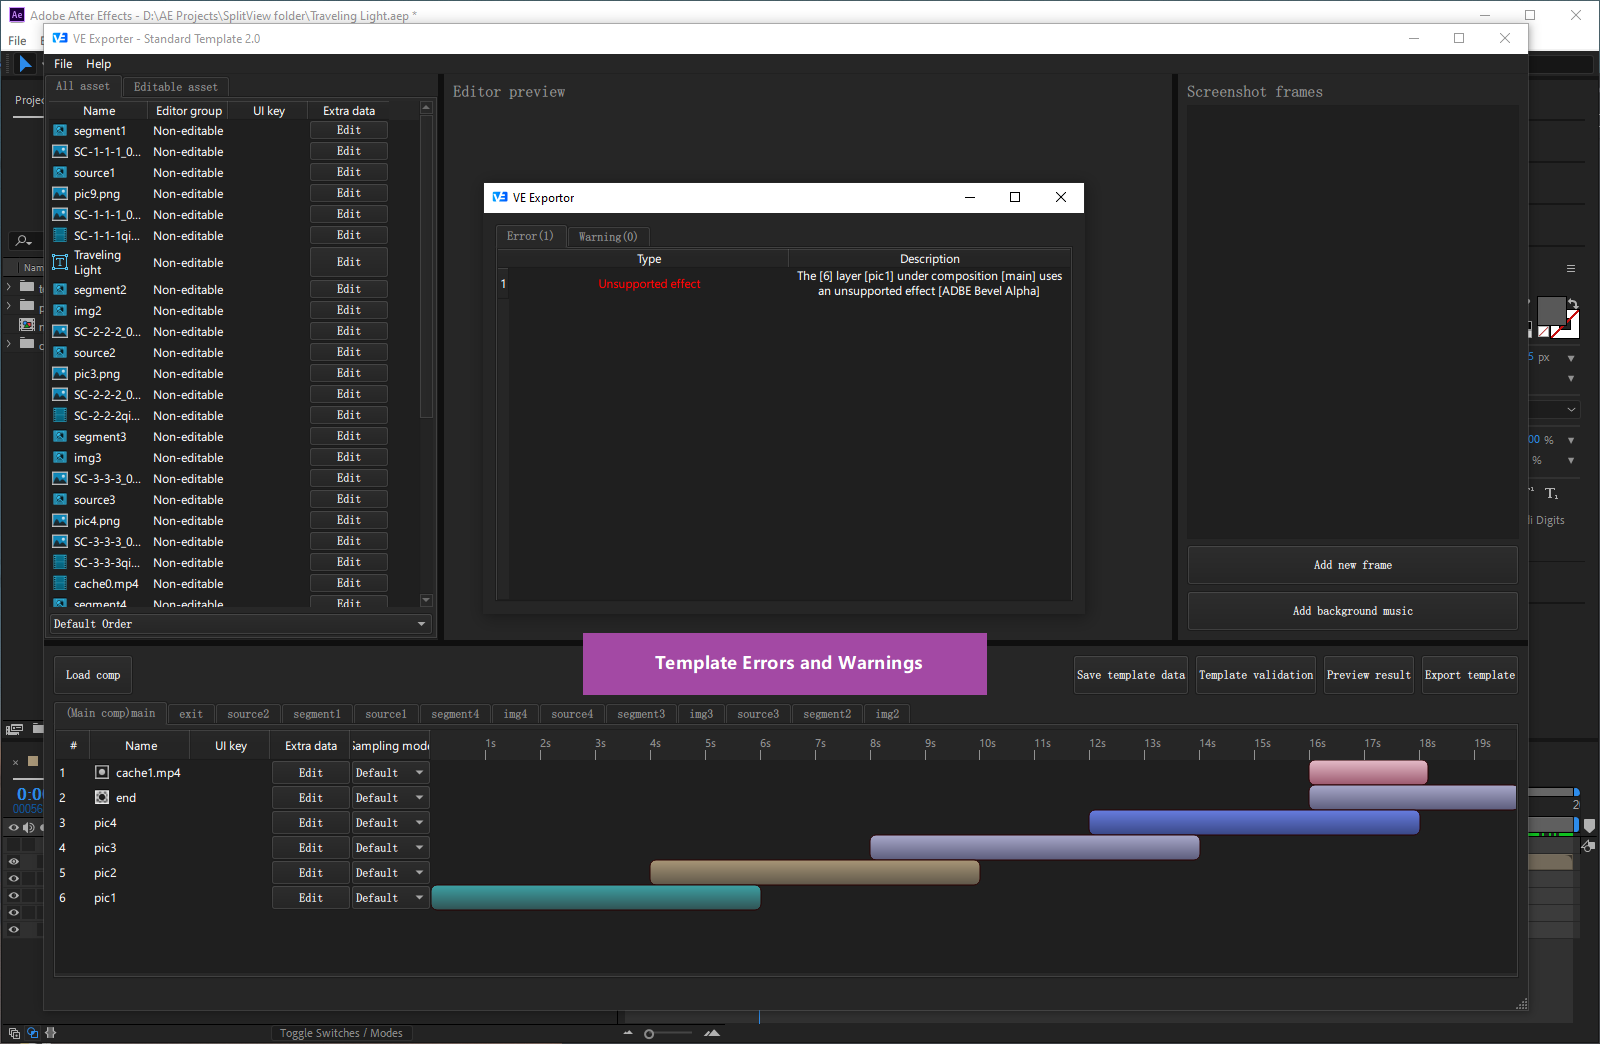
When loading your main comp, if you used some unsupported features, a window will pops up to show you the errors and warnings. You need to make changes to your project according to the errors and warnings.
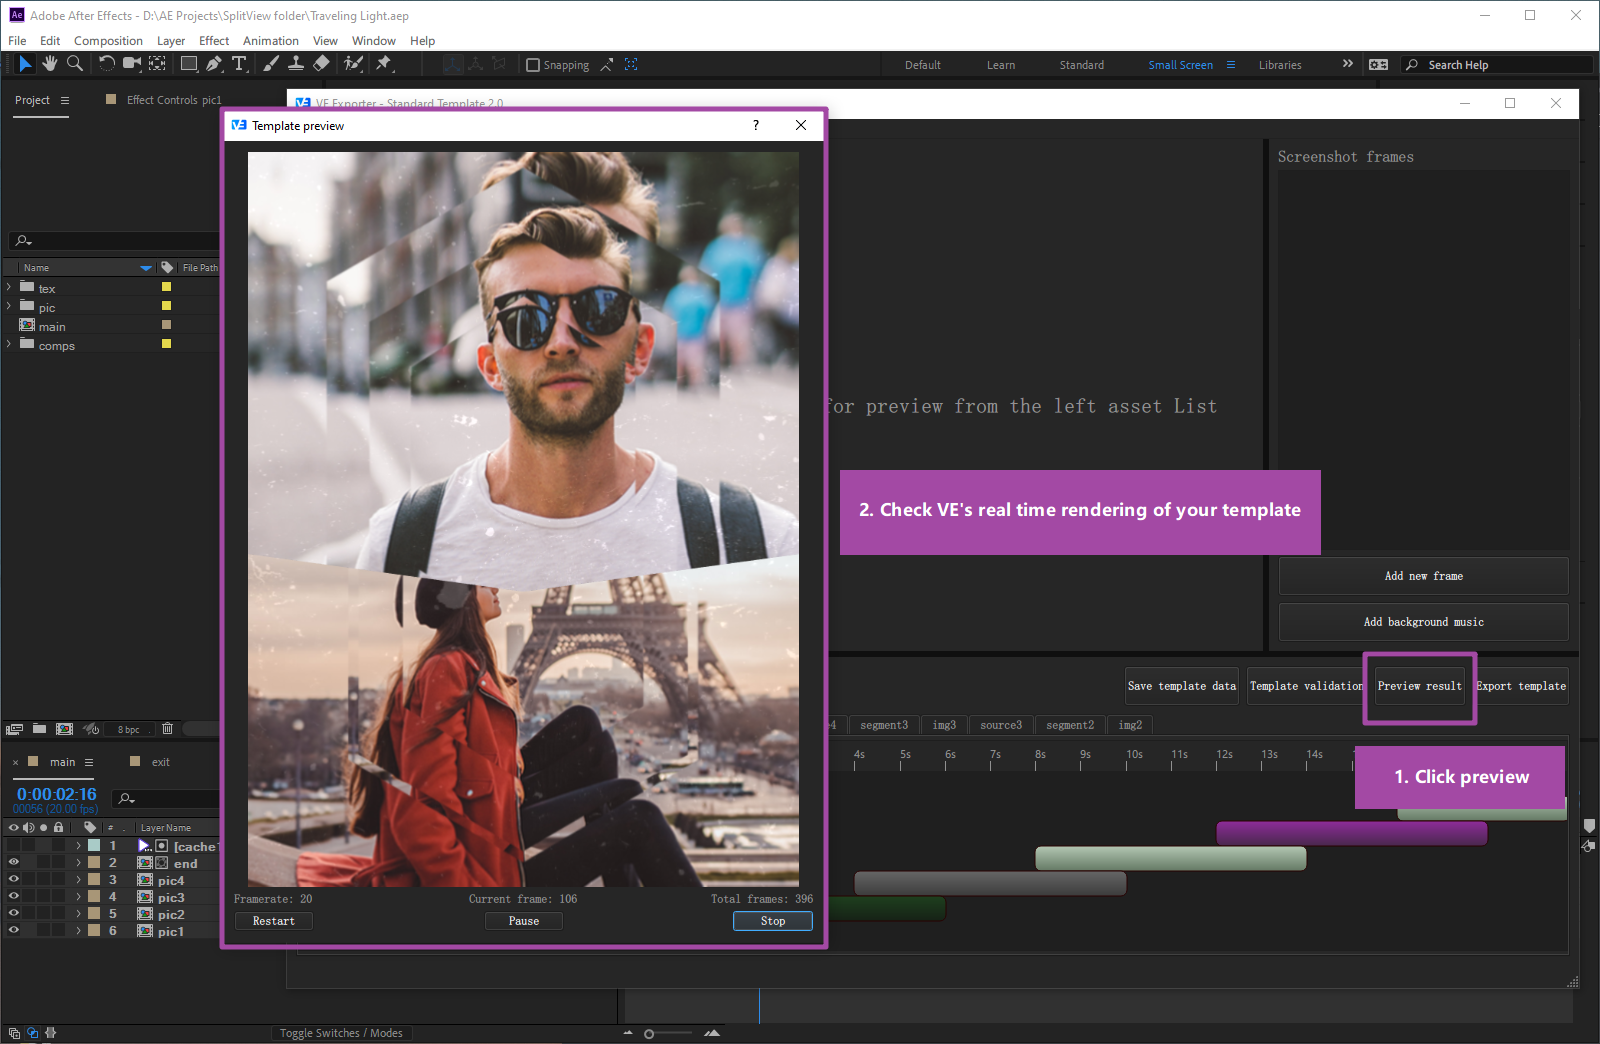
After successfully loading your main comp, you can preview it the check whether VE rendering it correctly.
When previewing your template, a new preview window will pops up, it uses VE SDK to render your template in real time.
The next and most important step is to mark editable asset files.
By default, all asset files used in your project are non-editable to users. You need to specify the asset files or texts you want users to edit manually.
You can reveal a layer\'s asset file in the asset list panel by right click on your layer in the timeline and select "Reveal layer asset" command or simply double click your layer.
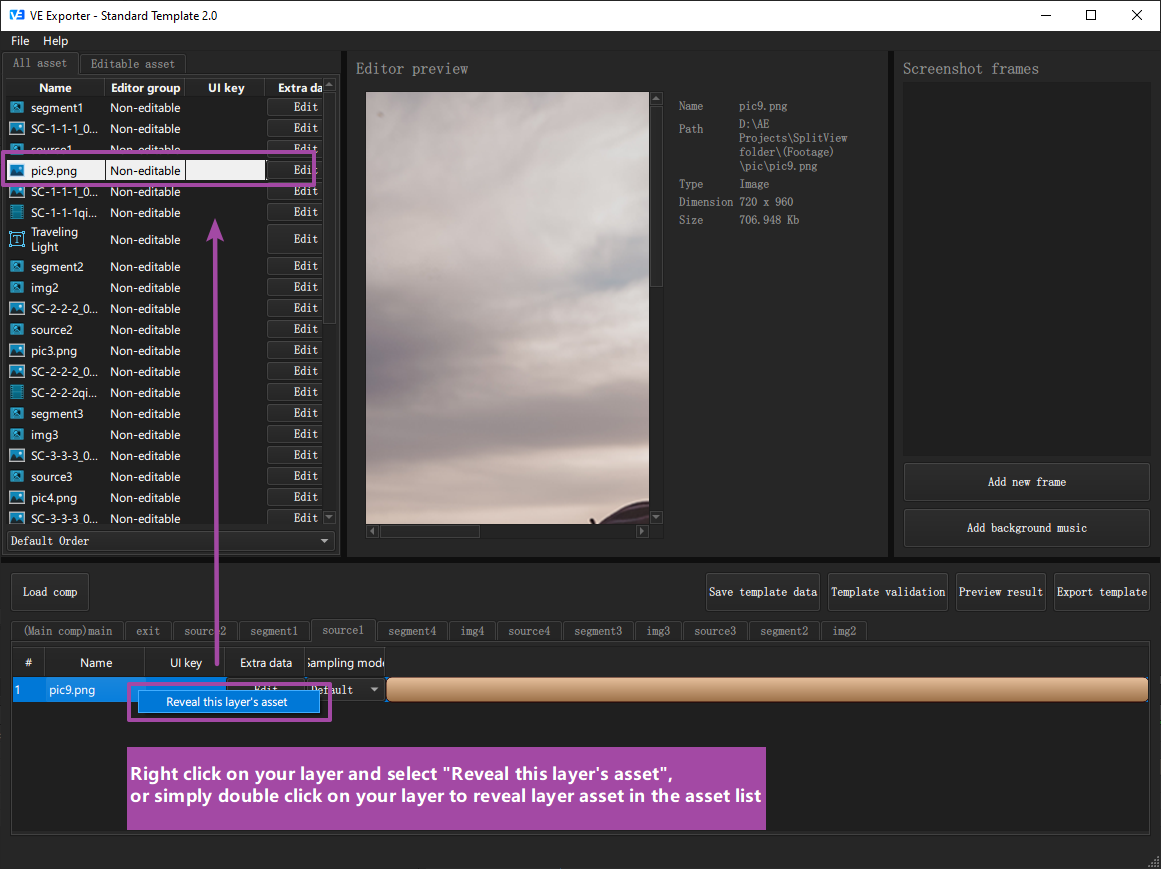
After revealing your asset, you can right click on your asset and set it to editable.

After setting your asset file to editable, your preview panel should now change to editor preview mode.
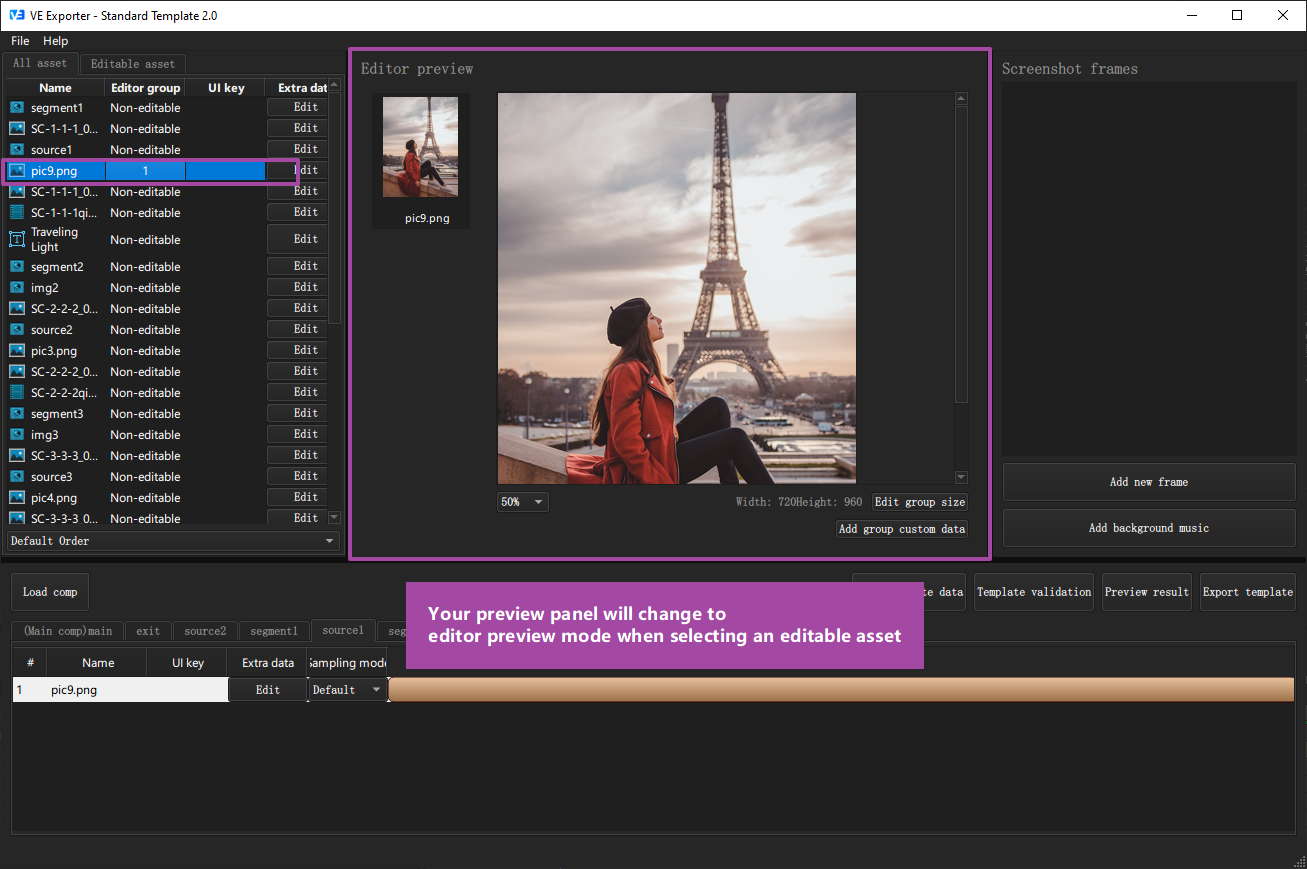
Repeating this step, and mark all the image or text assets as editable.
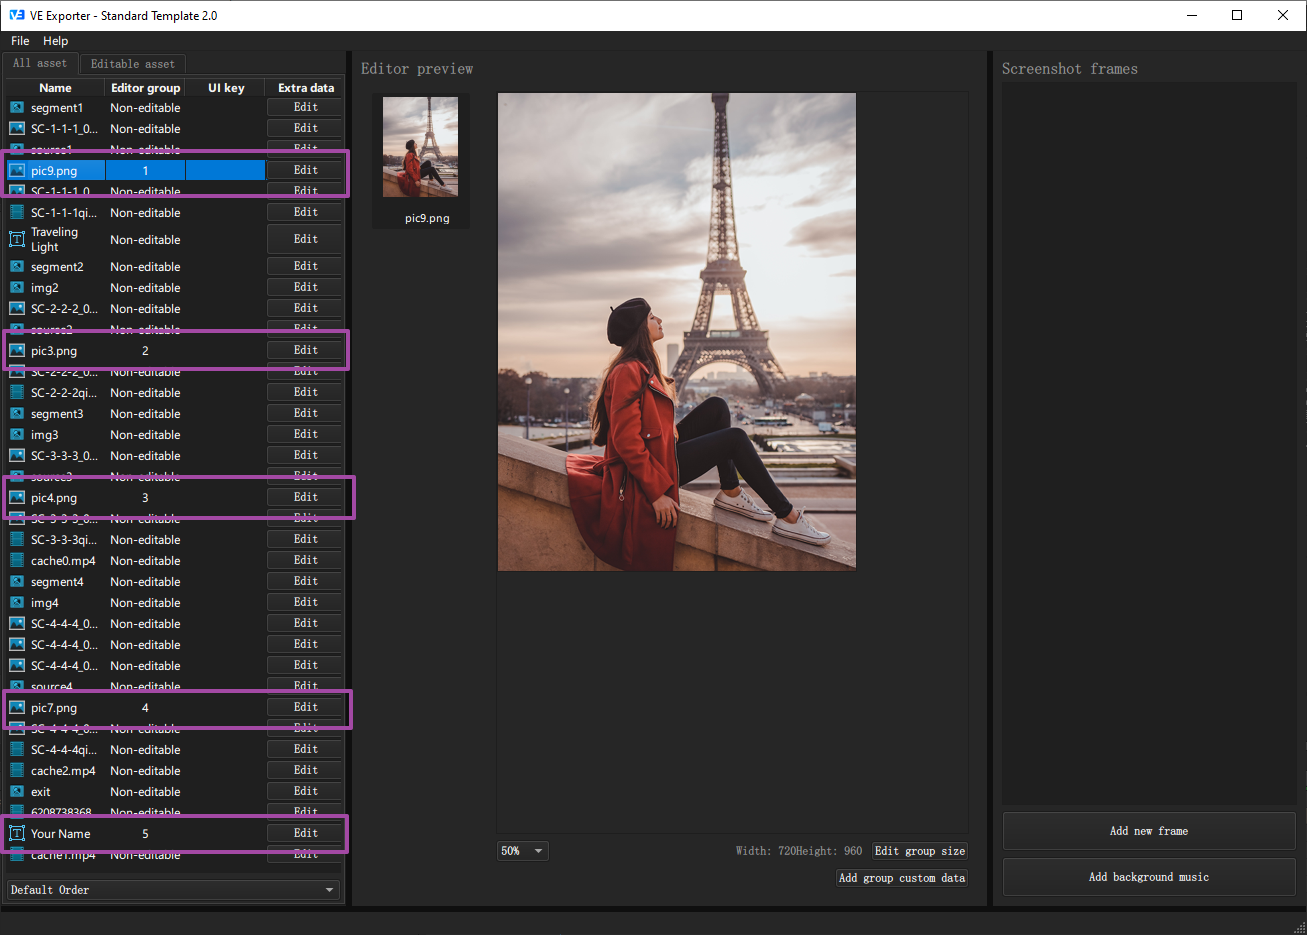
Set editor settings is also very important.
Editor settings control how your template editor looks like in your app when C-end users modifying your template. So, adjust editor settings properly can make your template more accessible to users.
Before we talk about those editor settings, I need to introduce you to a concept called editor group.
When we set up the template editor in our apps, normally we need to provide an editor UI for users and let them edit all the asset files one at a time. But the time will come when you want to put several related editable asset files in the same editor UI and let users modify them together.
To solve this problem, we created an editor group.
When you set an asset file to editable, it will be assigned an editor group automatically, and by default, each editable asset file has their own group.
But, in VE Exporter, you can move several editable assets to the same group, and arrange their order to make them appear at the same editor properly.
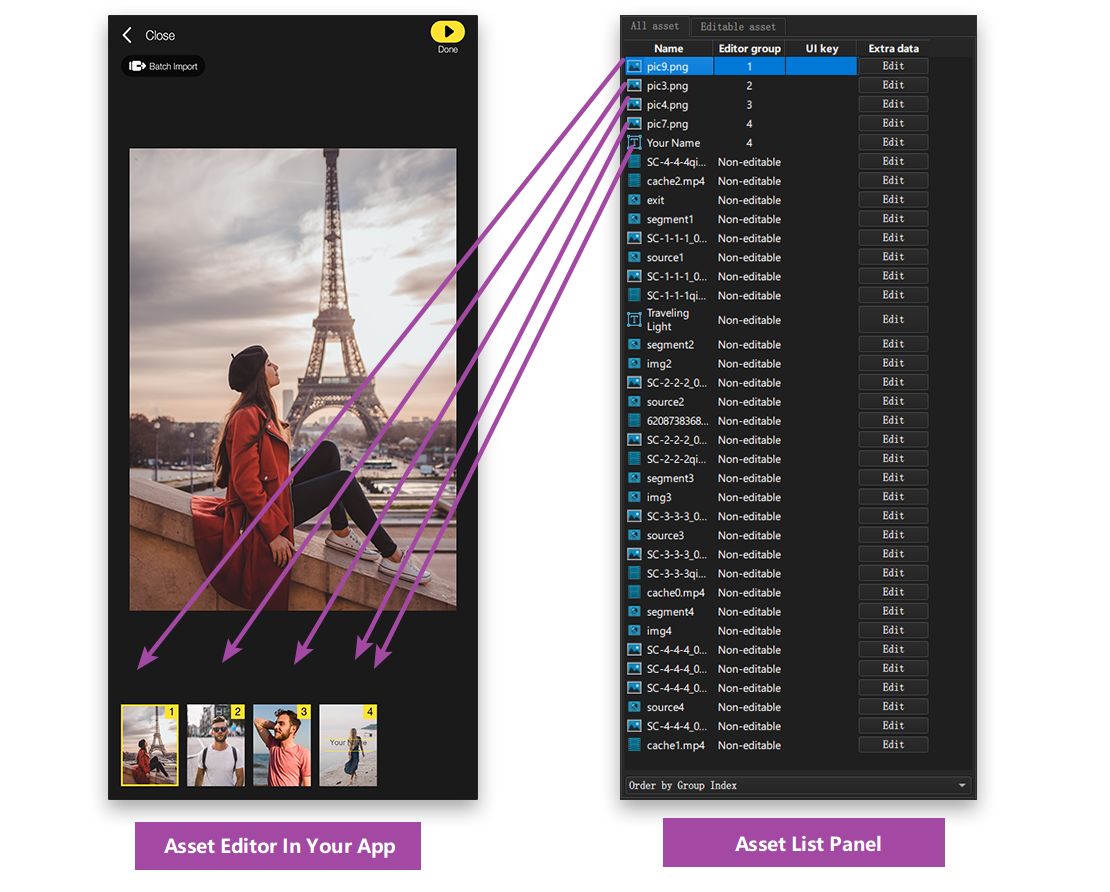
As you can see from the image above, there are 2 editable assets are both assigned to group 4. Editor group can be used to group multiple asset file to the same editor view. It also can set the order of the editable assets displayed in asset editor of your app.
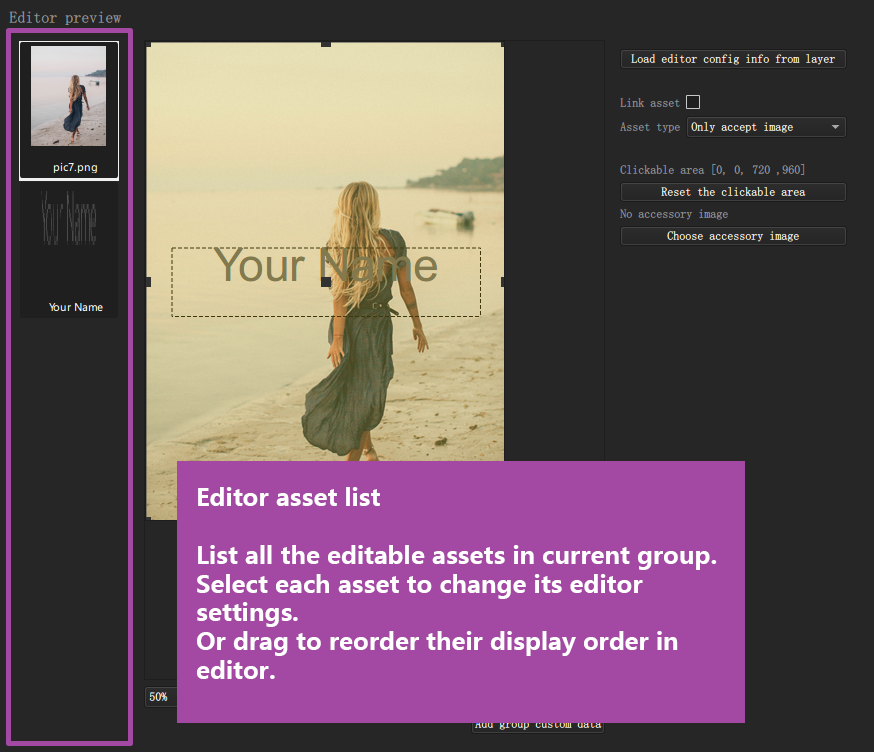
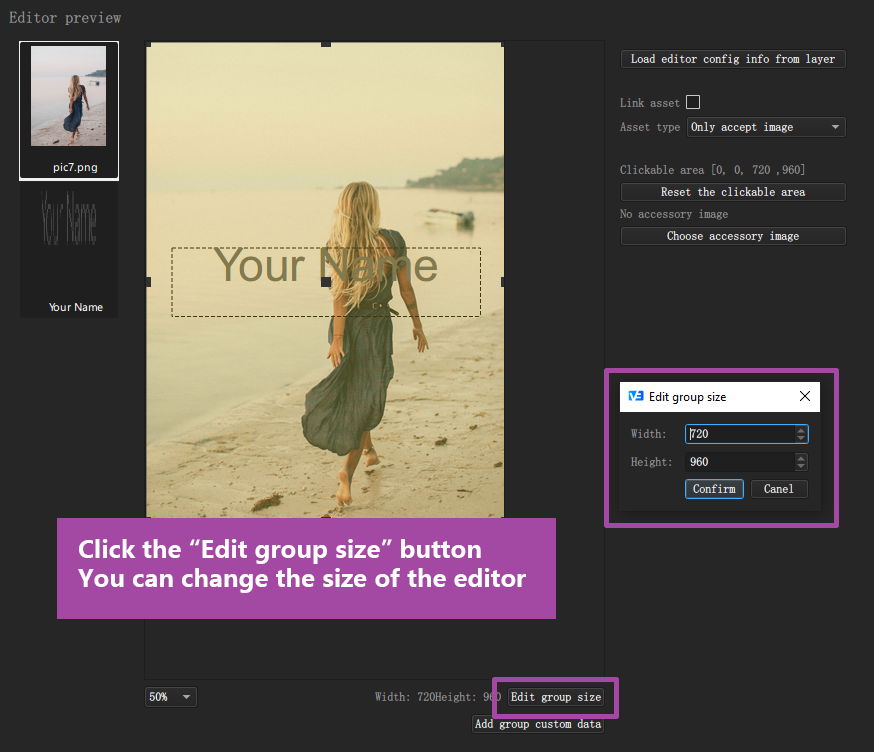
Asset Transform
When asset is displayed in the editor, you can set its default transform.
We do not provide any input box for you the change the default transform values such as position, rotation and scale. Instead, you can load those infos from existing After Effects layer.
To load transform info, first you select an After Effects layer, then click the "Load editor config info from layer" button to load transform data.
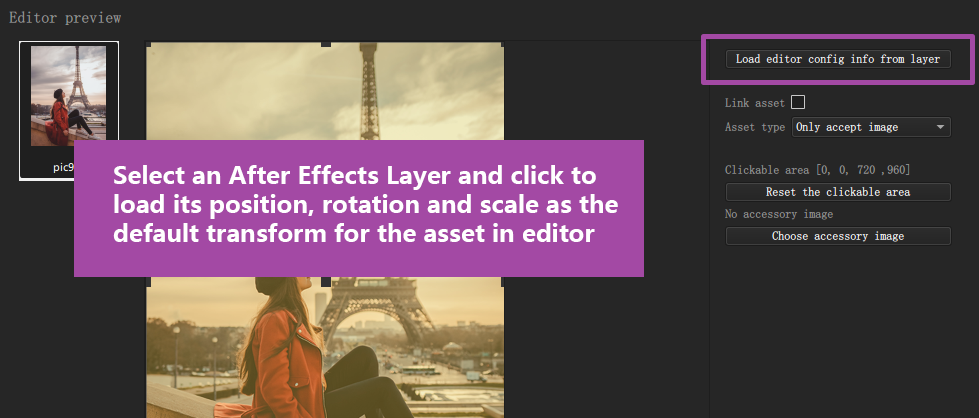
Asset Type
For an image asset, you choose wether you want users replace this asset by a video asset or not.
There are 3 options you can choose from,
Clickable Area
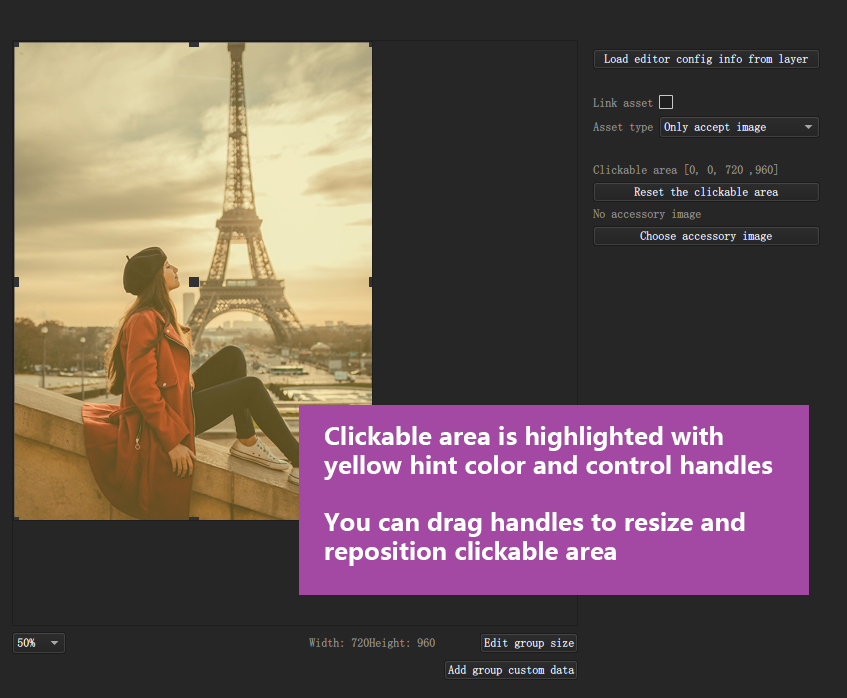
When user editing asset in editor, they can click on the editor to decide which asset they want to edit. You can set the clickable area for each asset, when user click or touch that area, the asset will be triggered for editing.
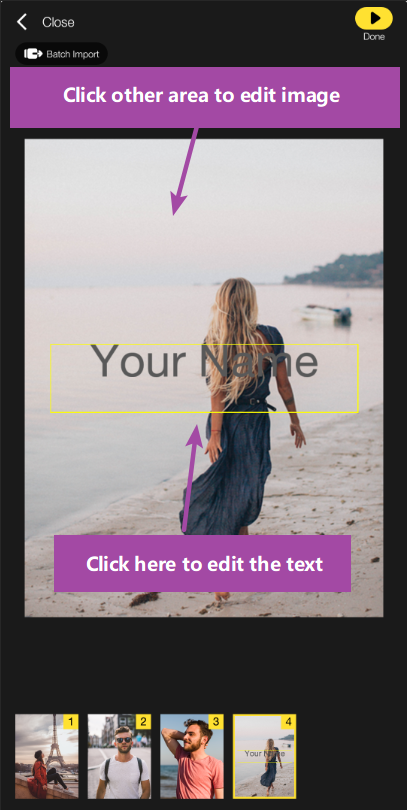
In VE Exporter editor preview panel, the clickable area for a asset is highlighted with yellow color and has handles at the edge.
You drag the handles to resize and reposition the clickable area of the asset.
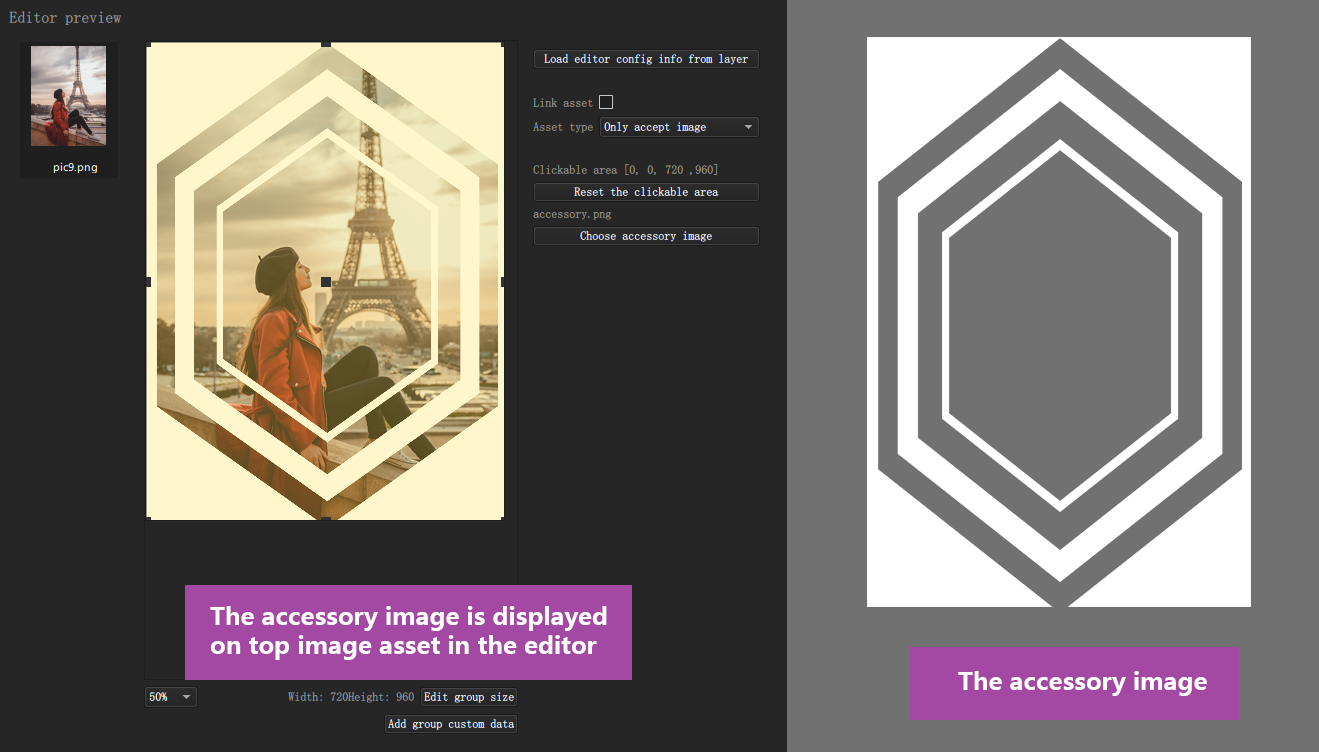
When an image asset is displayed in the editor, you can set an accessory image for the image to give users some idea how this asset is displayed in the result video.
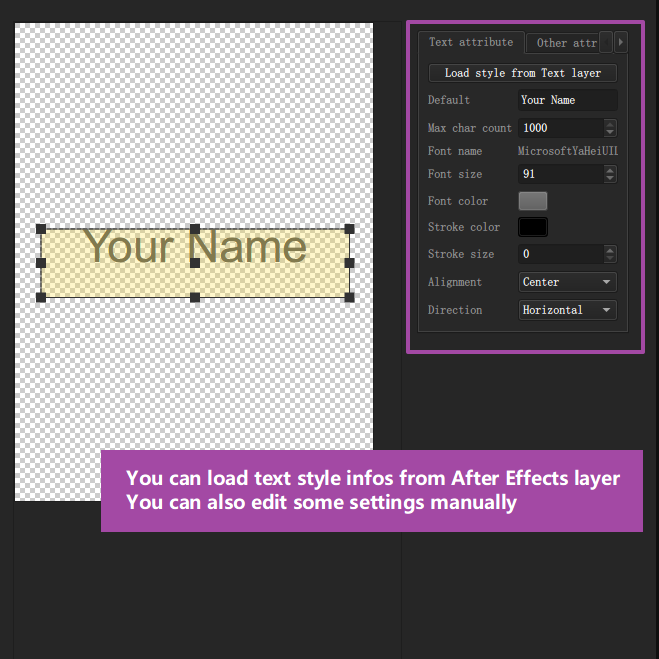
Max Char count
The maximum char count that users can set for this text asset
Font Name
The name of the font this text asset is using
Font Size
The font size of this text asset
Font Color
The fill color of this text asset
Stroke Color
The stroke color of this text asset
Stroke Size
The stroke size of this text asset
Alignment
The text alignment of this text asset
Direction
The text layout direction of this text asset
Line Height
The line height of the text asset. Note this setting is not displayed on the UI.
Clickable Area
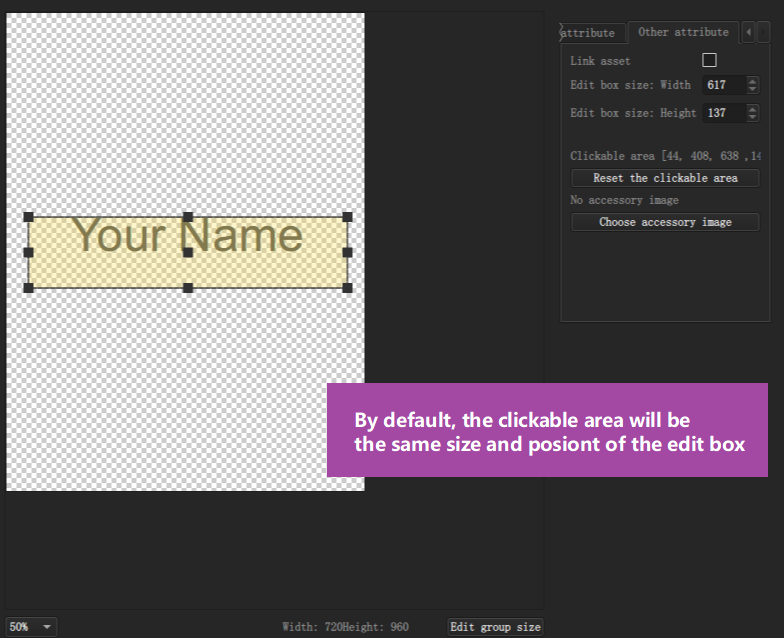
Clickable area for text asset works the same way as image asset.
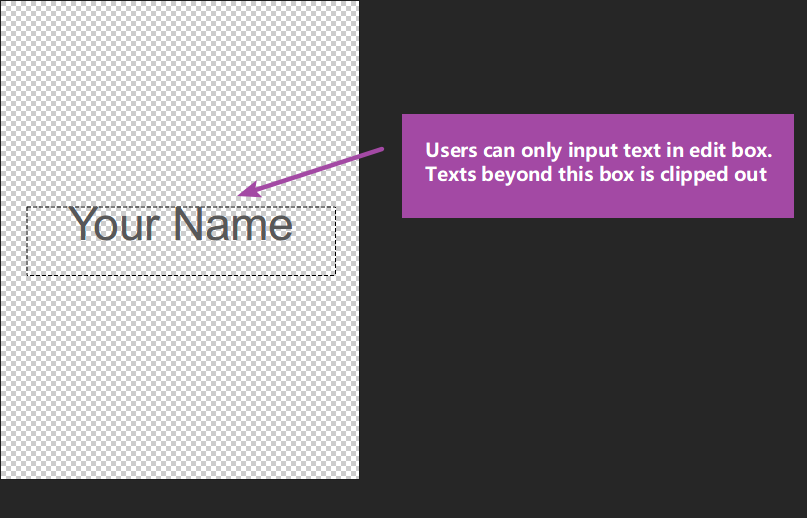
By default the clickable area for a text asset is set to the same size and position of the edit box of the text asset. You can change clickable area by drag its handles.
Accessory Image
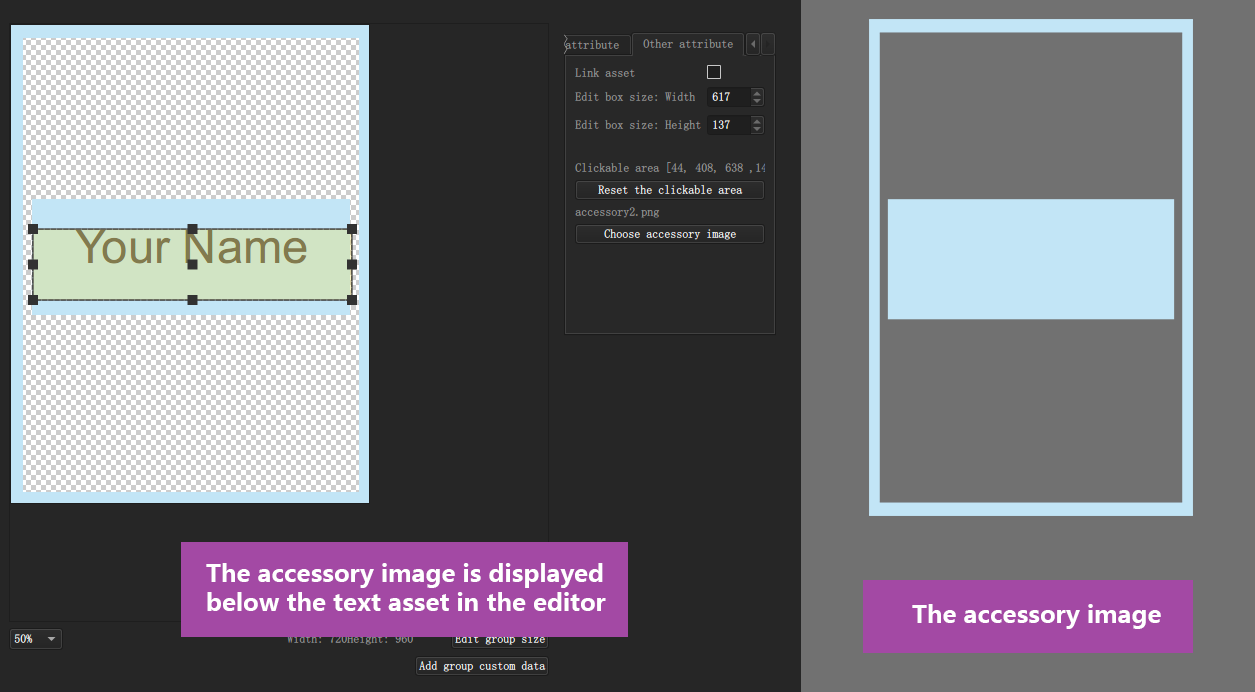
Text asset has accessory image too, it works the same way too.
But text asset accessory image is displayed below the text.
After changing your editor settings, we recommend you to click the "Template Validation" button again to check if there are anything wrong with your template.
OK, that\'s it, you can export your template now.
Click the "Export template" button and select a folder you want to store your template files, you template data should be saved to there automatically.
You can open your template folder to check out content of VE template.
A typical VE template contains 4 parts,
| Item | Remarks |
|---|---|
| assets folder | contains all the asset files used in the template |
| datas folder | contains all the animation data files |
| ui folder | contains all editor accessory images |
| config.json | contains the structure data of your template |

Now you can distribute your template in your apps.
When rendering an VE template, VE SDK loads the data from template files and construct the composition and layer structures dynamically according to the content of your template. So modifying the content of your VE template can directly change the result.
If you want to achieve some advanced functionalities in your product that we do not already provide, it necessary to understand the data structure of VE template.
 账号信息
账号信息 我的产品
我的产品 退出登录
退出登录